
How to turn your Android into a powerful gateway for S-Mailer
One of the most powerful features of S-Mailer is that you don’t need any special hardware to start sending SMS. Any Android phone can become a sending gateway. This guide walks you through it, step by step.
What you’ll need
- An Android phone (Android 8.0 / API 26 or newer) with an active SIM.
- An S-Mailer account with a token balance. Sign up here.
- The S-Mailer Android app — download the APK.
Step 1 — Install the app
⬇️ Download the S-Mailer app (APK)
Install it on the phone you want to use as a gateway. Because it is installed outside the Play Store, allow installs from your browser or file manager when prompted. Open the app and grant the SMS and phone permissions it asks for — it needs these to read your SIMs and send messages.
Updating later? Download the same link and install it straight over the app you already have — it updates in place and keeps your pairing and message history. One exception: if you installed a build from before August 2026, Android will refuse it with “app not installed” or “package conflicts with an existing package”. Those older builds were signed differently. Uninstall the old app once, install this one, and every update after that is a plain in-place upgrade.
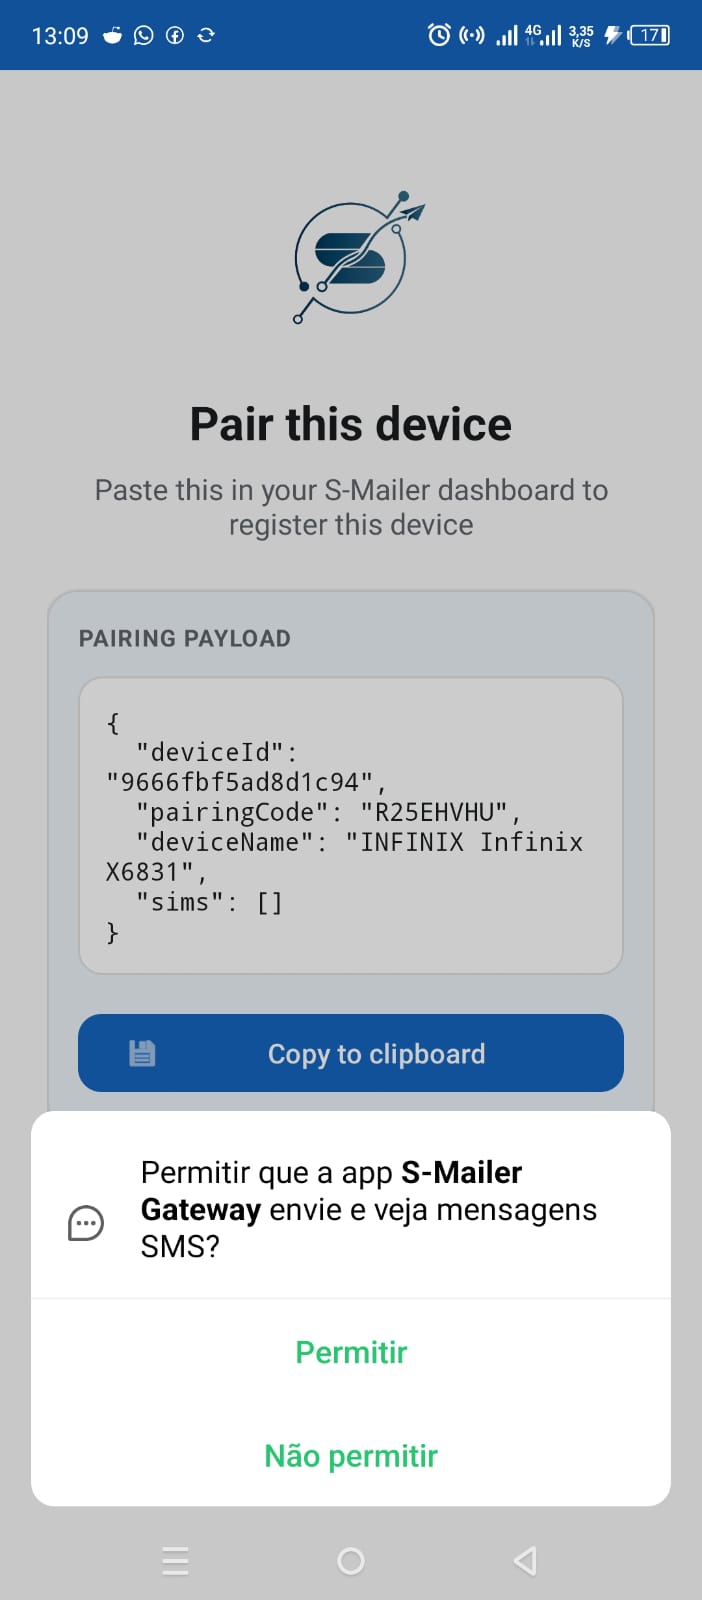 The permissions screen on first launch.
Step 2 — Copy the pairing payload
On first launch the app generates a pairing payload — a small block of JSON that identifies this device (its ID, a one-time pairing code, and its SIMs). Tap Copy to put it on your clipboard.
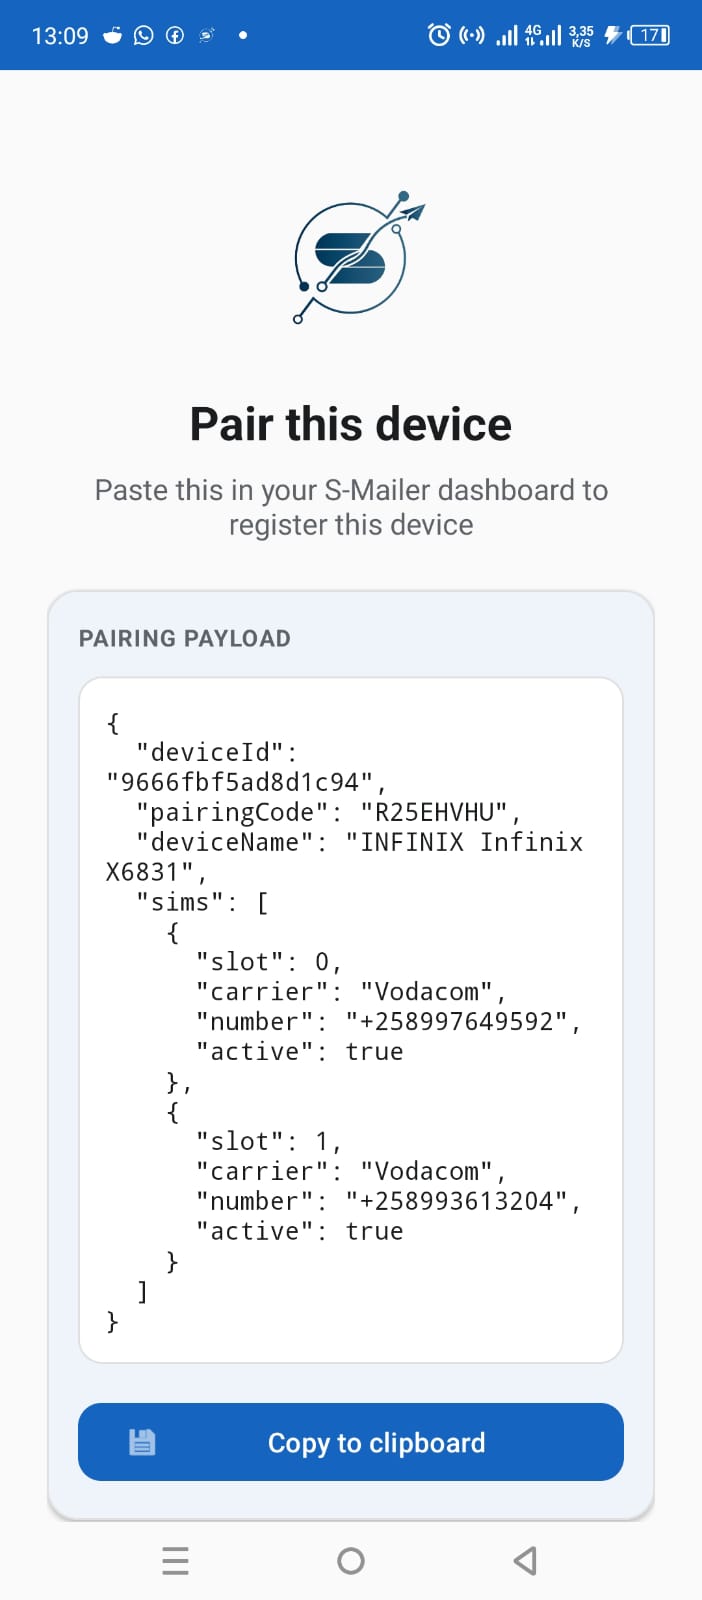 The pairing screen with the Copy button.
Which gateway should you pick? sms-co1 vs sms-co2
S-Mailer gives you two Android gateway options, and you choose which one when you register the sender. The app and the pairing payload are exactly the same for both — the only difference is how the phone waits for work. One device can even back one of each at the same time.
sms-co2 — set it and forget it
- ✅ The app does not need to stay open. The phone can be locked, the app swiped away or asleep — S-Mailer wakes it when there’s a message to send.
- ✅ Survives Android’s battery management, so it’s the better choice for an unattended phone that just sits there being a gateway.
- ⚠️ Slightly higher latency: if the phone has been idle, the first message can take a few extra seconds while it wakes up.
- ⚠️ Needs a reliable internet connection to be reachable.
sms-co1 — instant, but keep it running
- ✅ Lowest latency — the phone holds a live connection, so it sends the very moment a request arrives.
- ⚠️ The app must stay open and connected in the foreground, and the phone awake and online. Close the app or let the phone sleep and sending pauses until you reopen it.
- ⚠️ Needs the battery-optimisation exemption (the app prompts for it) and, in practice, more babysitting for a phone meant to run unattended.
Rule of thumb: for a phone that will run on its own, pick sms-co2. Pick sms-co1 only when the phone is attended and you want the snappiest possible sends.
Step 3 — Register the sender in the dashboard
- Log in to the S-Mailer dashboard.
- Go to Senders → Register sender.
- Choose a gateway — sms-co1 or sms-co2 (see Which gateway? above).
- Paste the pairing payload you copied from the app.
- Save.
S-Mailer then pairs your device to the new sender.
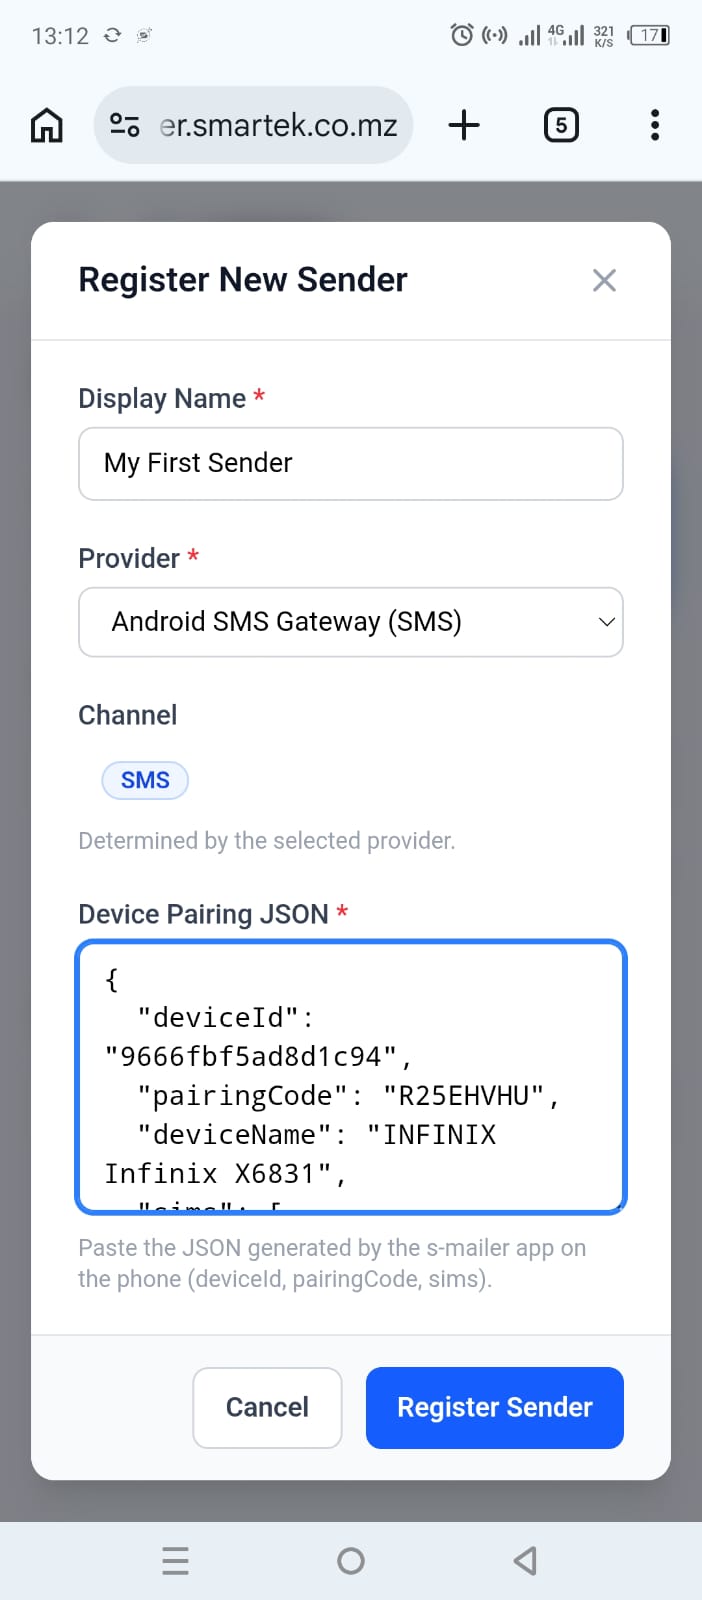 The sender registration form in the dashboard.
Step 4 — Confirm it is paired
Back on the phone, the app switches to its dashboard and shows “Paired with <your company>“. Keep the phone online and waiting for messages to send. If you paired on sms-co1, leave the app open in the foreground; on sms-co2 you can close it — S-Mailer will wake it when there’s work.
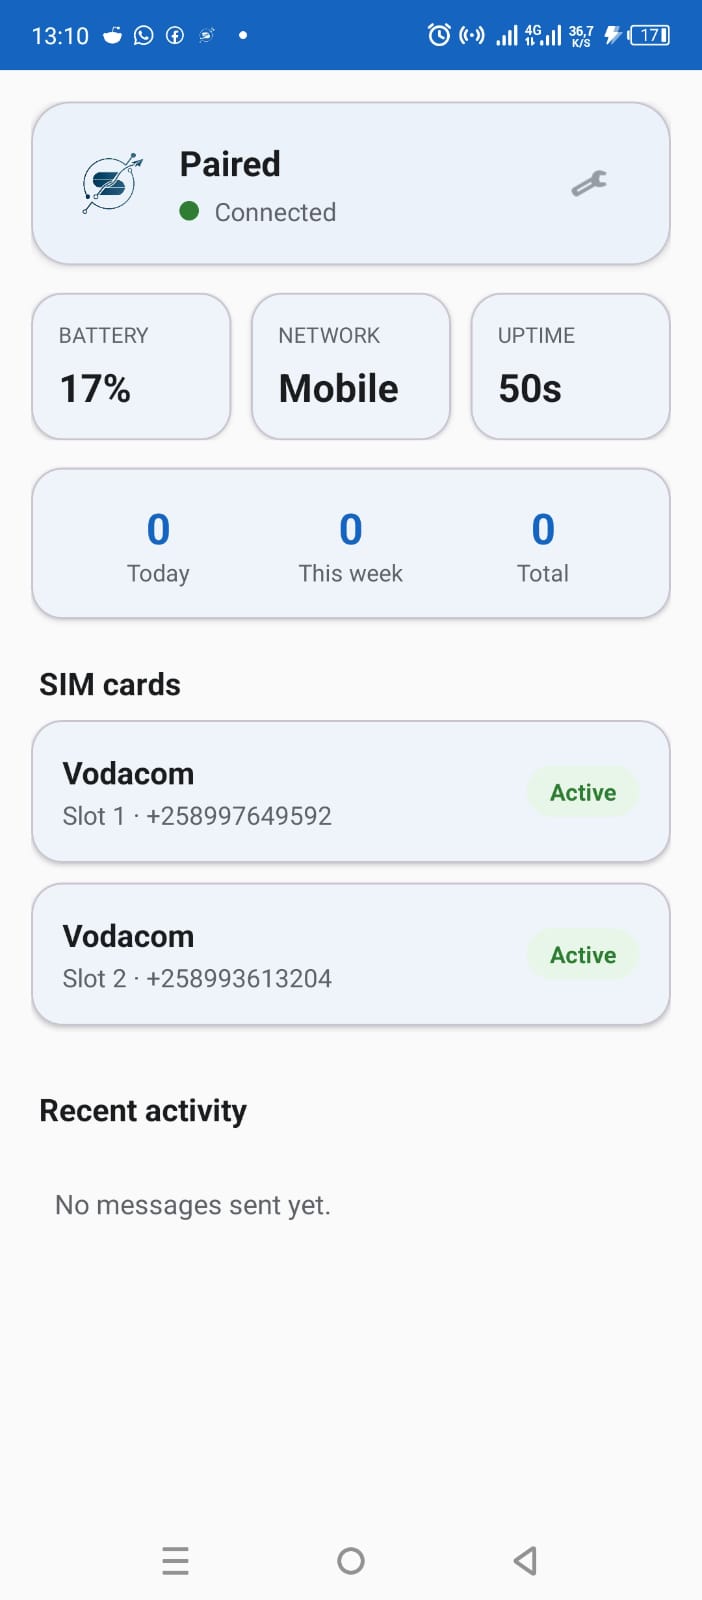 The app showing the paired status.
Step 5 — Send your first message
Create an API key (API Keys → New key, with the Send permission for the SMS channel), then call the API:
curl -X POST https://api.mailer.smartek.co.mz/api/v1/send \
  -H "X-Client-ID: <your-client-id>" \
  -H "X-Client-Secret: <your-api-key>" \
  -H "Content-Type: application/json" \
  -d '{
        "channel": "sms",
        "recipient": "+258840000000",
        "content": "Hello from my Android gateway!"
      }'
Your phone receives the send request and sends the SMS through its SIM. The
delivery status flows back to your dashboard — and, as of the latest app, all the
way back to delivered (see below).
Choose which SIM sends (app 0.1.3)
Got two SIMs in the gateway phone? By default S-Mailer sends through the phone’s preferred SIM. As of app 0.1.3 you can pick the sending SIM yourself:
- Open the app and go to Settings.
- Under Send SIM, choose System default or a specific slot (each active SIM is listed with its carrier and number).
- Tap Save.
Every message this gateway sends from then on goes out on the SIM you picked — handy when one line has a better SMS bundle or a specific sender identity. Grab the latest APK to get the picker.
From sent to delivered: delivery reports
Android hands the app a delivery report once the carrier confirms the SMS
reached (or failed to reach) the recipient’s handset. The app relays that report
back through the connection, so a message can move past sent:
phone radio → app (delivery report) → gateway → S-Mailer Core → your status webhook
Core flips the recipient from sent to delivered (or failed) and, if you’ve
configured a status webhook, POSTs you the change. Set the status webhook URL
under Dashboard → Webhooks — it’s separate from the inbound webhook, and you
can also override it per message with a webhook_url on the send request. See the
inbound & status webhooks guide
for the payload.
Tips for a reliable gateway
- Keep the phone charged and online. A device on Wi-Fi or mobile data with a stable connection delivers fastest.
- Watch your SIM limits. Carriers may rate-limit or block high SMS volumes — spread load across multiple devices for scale.
sentmeans handed to the radio — but Android delivery reports can update it todelivered. The gateway relays the carrier’s delivery report back to S-Mailer Core, which flips the status and fires your status webhook (see Fromsenttodelivered). Delivery reports depend on the carrier honouring them, so treatdeliveredas best-effort.
That’s it — you’ve turned an ordinary Android phone into a programmable SMS gateway. Happy sending!